How to print Shopify shipping labels on a Zebra
New here? Start with create and print labels online free, the hub for design, barcodes, shipping, and thermal print setup. Also: free label maker software · full site map.
If you fulfill in-house on a Zebra, you do not need expensive label software, and you do not need to fight PDF scaling in the print dialog. Official Shopify postage still prints as issued. Pack faces you control can be designed here.
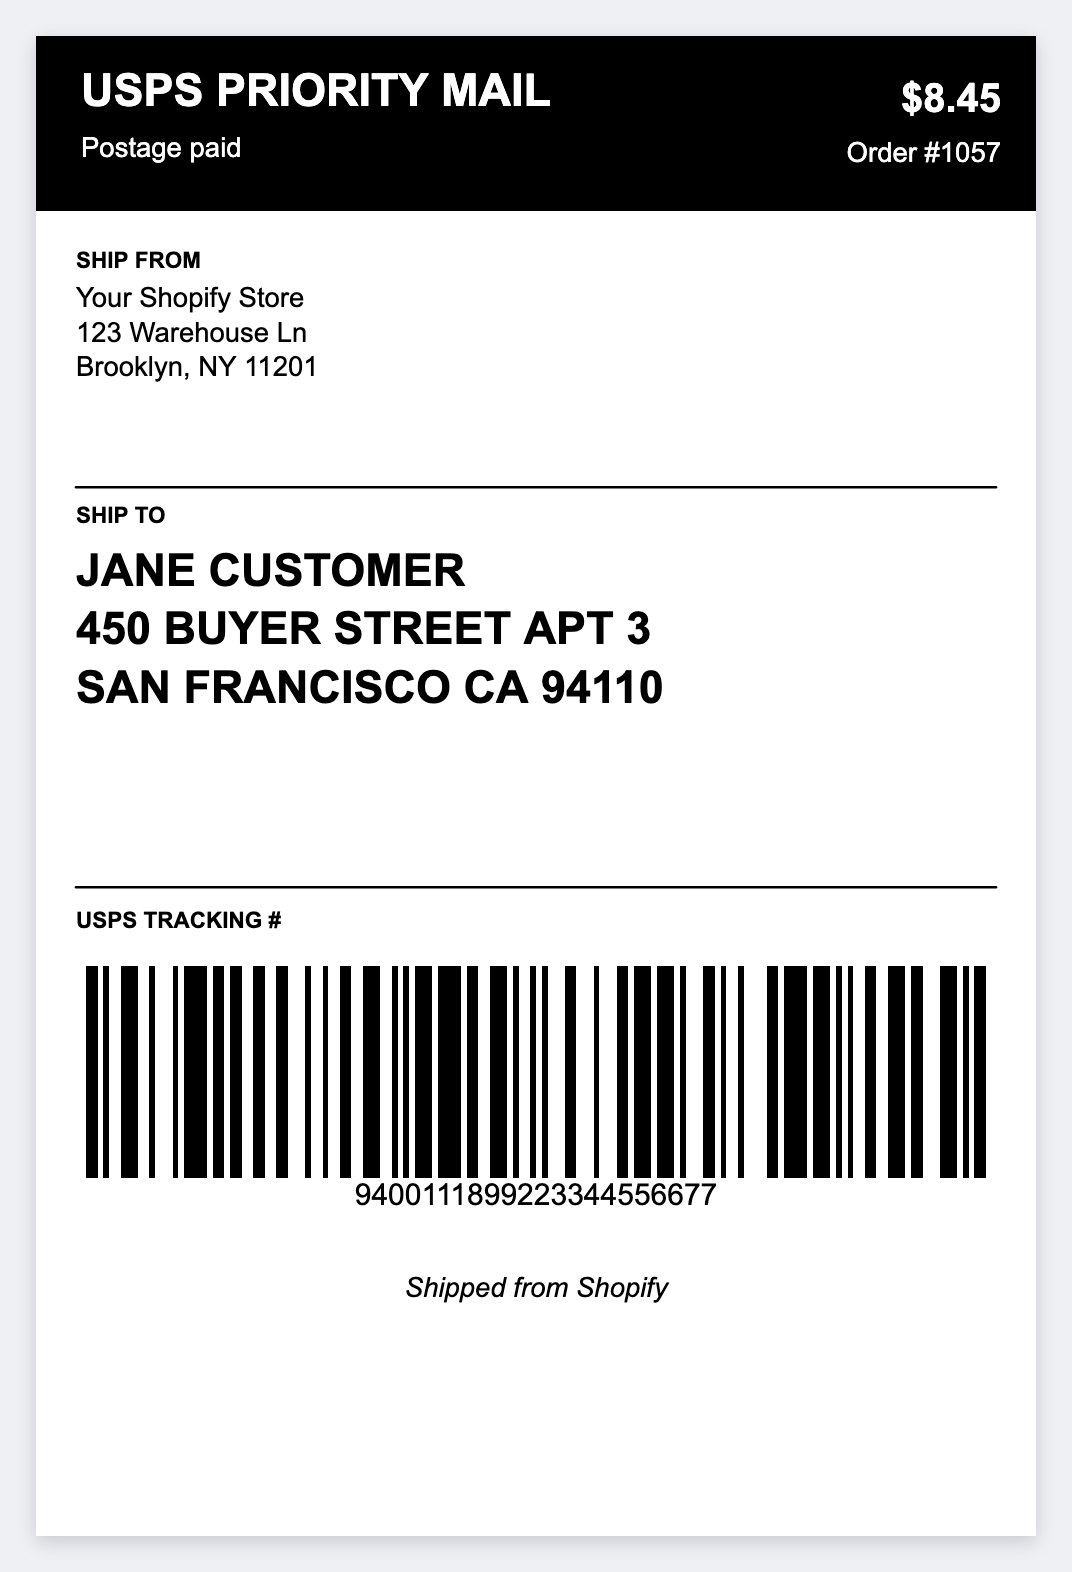
There is a built-in Shopify shipping template. Design once, export orders to CSV, load the sheet, preview every label, and batch-print to the Zebra. Or copy ZPL if you already have a print queue.
What you'll need
- Zebra 4×6 thermal printer + 4×6 label stock
- Zebra Browser Print installed (Mac or Windows)
- Shopify order export (CSV) with shipping address fields
- Tracking numbers if you buy labels outside Shopify (ShipStation, Pirate Ship, etc.)
Step 1. Export orders from Shopify
Get a CSV of orders to ship
In Shopify Admin: Orders → filter to unfulfilled or today's orders → Export → Orders by date range → CSV for Excel/Numbers.
Useful columns (rename headers to simple names for tokens):
order_number(from Name (e.g. #1042)name) Shipping Nameaddress1,address2,city,province,zip,countrytracking, if you have tracking from your carrier toolweight,items, optional line for packing slips on same label area
If you use ShipStation or Pirate Ship for purchased labels, export their CSV instead, same variable workflow applies.
Step 2. Load the Shopify shipping template
Start from the built-in template
Open app.mylabelmaker.com. Left rail → Templates → Shipping category → choose Shopify shipping (4×6 layout with ship-to block, order ref, and tracking barcode area).
Customize branding: add your store logo (Add Image), adjust fonts, or add a return address block. The template is a normal editable design, not locked.
Step 3. Map columns to your CSV
Insert tokens that match your spreadsheet headers
Double-click text fields and replace static text with placeholders like {{name}}, {{address1}}, {{city}} {{province}} {{zip}}. For tracking barcodes, set the barcode value to {{tracking}} (CODE128 works for most carrier tracking numbers).
Column names are case-insensitive and trimmed, {{Name}} matches a header name.
Step 4. Preview every order
Paste CSV or use Google Sheets
Click the {{ }} Variables button (or Options → Variables). Paste your Shopify CSV, upload the file, or paste a published Google Sheets CSV URL.
Use the row navigator (first / prev / 3 of 47 / next / last) to spot-check addresses and barcodes before printing. Edit a cell inline if one zip code is wrong.
Full walkthrough: print labels from Google Sheets.
Step 5: Print or export ZPL
Batch print to Zebra
Select your printer in the toolbar. Print now shows row count (e.g. "Print 47 rows"). Each order prints one label with substituted data.
For automated shipping pipelines: Options → Copy ZPL per row or integrate exported ZPL into your backend. See ZPL export for ERP.
shopify-shipping-v1.json. Tomorrow's fulfillment is: import JSON, paste new CSV, print.Open Shopify shipping template
Shopify + Zebra workflow comparison
- Shopify Admin PDF print, slow, scaling issues, no batch variable control
- Dymo / Brother consumer tools (not ZPL, not Zebra hardware
- BarTender / NiceLabel) paid, Windows-heavy, overkill for small stores
- mylabelmaker, free browser editor, Shopify template, CSV batch, Mac + Windows, native ZPL
Ship today's Shopify orders
Open the editor, load the Shopify template, paste your order CSV, and print.
Open shopify shipping template